Posted on Leave a comment

Importance of Grapes in winemaking

close up of hundreds of red grape clusters
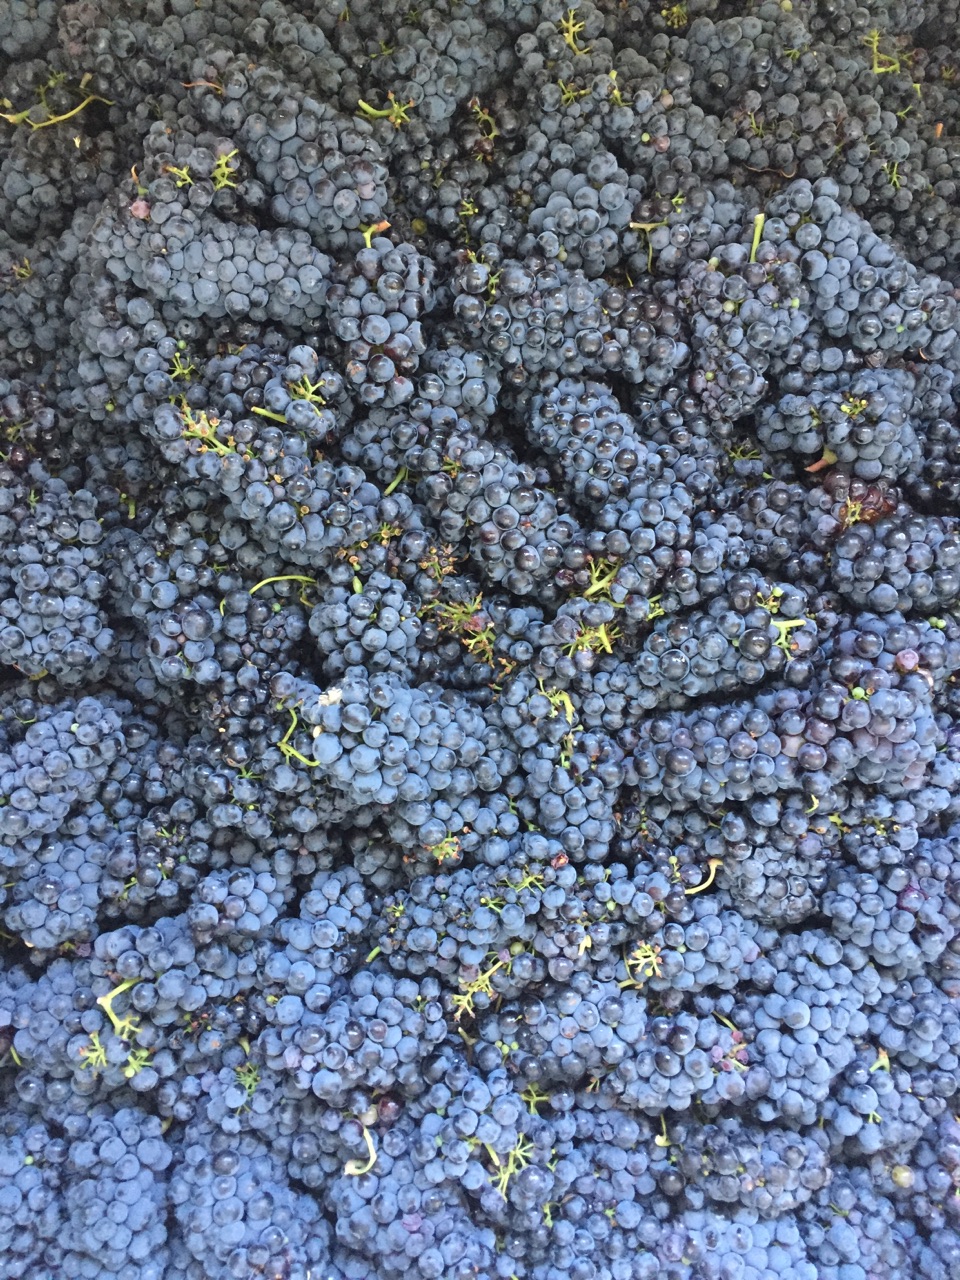
When it comes to making exceptional wine, it’s easy to focus on the equipment, techniques, and chemistry in the cellar. But seasoned winemakers know the truth: great wine isn’t made—it’s grown.

The quality of your vineyard and grapes sets the foundation for everything that follows. No amount of adjustment or analysis can fully compensate for poor fruit, while high-quality grapes often require less intervention and yield more expressive, balanced wines.

Every vineyard has its own unique combination of soil, climate, elevation, and sun exposure. These factors shape how grapes develop, influencing sugar levels, acidity, tannins, and aromatic compounds.

Grapes grown in well-suited vineyard sites tend to ripen more evenly and develop greater complexity. Balanced conditions—neither too harsh nor too fertile—encourage vines to produce fruit with concentrated flavors rather than excessive yields.

It’s important to evaluate the vineyard as a whole—ensuring the fruit is ripening properly and that the grower is actively managing the vines to prevent damage. While we have limited experience growing grapes ourselves, we’ve spent many harvests hand-picking and have seen our fair share of both care and neglect.

If you are a newer home winemaker and are using one of the many wine kits available, these are generally set up so that you can get through primary fermentation without any adjustments or additions. It is common for pH and TA measurements to be supplied by the maker of the kit.

How Testing Fits In

Keep Reading More!

Posted on Leave a comment

Bulk Aging in Wine: Best Practices, Monitoring, and Troubleshooting

wine barrels on racksBulk aging is where wine quietly becomes what it’s meant to be—or, if you’re not paying attention, something you never intended. It’s one of the most critical phases in winemaking, where time, chemistry, and technique all work together to shape a wine’s final character.

Oak barrels, in particular, can add remarkable complexity, texture, and aromatic depth. But they’re not a “set it and forget it” solution. Bulk aging—whether in oak, flex tanks, or glass carboys—requires thoughtful monitoring and occasional intervention to keep things on track and avoid unwanted surprises.

In this guide, we’ll walk through how bulk aging works, what to test for along the way, and how to troubleshoot the most common issues that can arise during the process.

Our perspective comes from hands-on experience. At our sister company, Little Oaks Winery, we produced wines from North San Diego County grapes for a decade. While production ended in 2022, we’re still aging and selling those wines—and still learning from them.

Our winery focused on varietals that thrive in the region: mostly Viognier for whites, and Sangiovese, Malbec, and Barbera for reds, with some Cabernet and Syrah in the early years. The whites were fermented cool at about 55°F, and left on lees for about five months after one racking, and did not undergo malolactic fermentation. The reds were fermented at room temperatures, underwent malolactic fermentation to completion, and then bulk-aged in Hungarian oak barrels for 12 to 18 months.

Along the way, we made some excellent decisions—and a few memorable mistakes. This guide is built on both.


Keep Reading More!

Posted on Leave a comment

Malolactic Fermentation – An Overview

Malolactic fermentation (MLF) is typically carried out in most red wines and in some white varietals.  MLF plays an important role in the finished wine’s feel and taste. MLF reduces acidity and produces flavors often characterized as “soft” or “buttery”.  In addition, carrying out MLF before bottling prevents an unintended development of carbon dioxide gas (CO2) due to MLF starting up in the bottle, which can lead to fizzy wine, or worse, exploding bottles!

Malolactic fermentation uses the beneficial bacterium Oenococcus oeni (O. oeni) to convert malic acid to lactic acid, and CO2:

Malic Acid                       O. oeni           Lactic Acid      +    carbon dioxide

HOOC–CH2–CH(OH)–COOH           CH3–CH(OH)–COOH  +  CO2

Sulfite, as free SO2, inhibits the O. oeni’s activity, so free SO2 levels must be kept low during MLF. This leaves the wine at risk of oxidation and microbial contamination.  As soon as MLF is done, then, SO2 should be raised to appropriate levels for protection of the wine.  Thus it is important to know when MLF is done, and the best way to do this is to measure malic acid levels in the wine.

Should I do MLF?
Keep Reading More!

Posted on 2 Comments

It is time to start thinking about Residual Sugars

Now that harvest and fermentation is or soon will be underway for most of us, it’s a good time to be thinking about Residual sugar (RS), which refers to any significant concentration of sugars contained in wine, beer or cider at the end of fermentation. Winemakers and brewers are typically most interested in knowing the concentration of the fermentable hexoses glucose and fructose, the main reducing sugars;  in some cases, sucrose may also be present. These determine the level of sweetness of the finished product.

If your goal is to make a relatively dry wine, you want to be sure it’s dry enough to be stable. At RS levels around 2 g/L (0.2%) or higher, an alcoholic beverage can spontaneously restart fermentation unless it has been properly stabilized, resulting in popped corks and fizzy wine.  In some regions with warmer dry climates like California, Arizona, Eastern Oregon/Washington and similar areas, red varietals in particular are likely to come in at high starting sugar levels, like 25 to 27 Brix; these have the potential to achieve high alcohol levels that can inhibit yeast fermentation and leave appreciable RS, risking stability later on.

Measuring RS with the Vinmetrica Kit

The Residual Reducing Sugar (RRS) test , also known as the Rebelein or Gold Coast Method, determines the amount of residual sugar through a first reaction followed by a titration from a buret; it’s a pretty simple procedure that takes about a half hour, and multiple samples can be processed at the same time.  The product listing on our web page is here:

https://vinmetrica.com/product/new-residual-reducing-sugar-assay-kit/

Posted on Leave a comment

The importance of YAN (Yeast Assimilable Nitrogen) in winemaking

YAN is a critical component for healthy and complete fermentation, and it directly impacts the final characteristics of a wine.  Therefore it can be important to test and control its levels.

  • Ensures proper fermentation: Yeast needs nitrogen to grow and stay active. Winemakers measure YAN levels in the grape juice (must) before and during fermentation to ensure the yeast has enough nutrients to convert sugar into alcohol.
  • Prevents stuck fermentation: A deficiency in YAN can cause a “stuck” or sluggish fermentation, which negatively affects the wine’s final quality.
  • Influences aroma and style: YAN levels can affect a wine’s flavor profile. For example, some studies suggest that moderate YAN can produce more clean and fruity aromas in young wines.
  • Impacts spoilage risks: Insufficient YAN creates a “nutrient desert” for spoilage organisms, which can be desirable. However, too much inorganic nitrogen can also increase the risk of off-flavors, such as ester taint.
  • YAN is simple to measure with Vinmetrica’s reagents, allowing easy adjustment of levels.

Yeast assimilable nitrogen is an important nutrient in fermentation of wines, beers, and other juices. If

levels are too low, fermentation may stop prematurely, and/or off odors can develop (mostly from

generation of hydrogen sulfide – “rotten egg” smell).  To prevent this, you may need to add supplements like DAP or other yeast nutrients before and/or during fermentation. Many yeast and nutrient manufacturers follow a study by the UC Davis Department of Viticulture and Enology relating optimal YAN levels (in milligrams of nitrogen per liter, mg N/L) to wine’s brix level at harvest:

21°Bx = 200 mg N/L              25°Bx = 300 mg N/L

23°Bx = 250 mg N/L              27°Bx = 350 mg N/L

How to measure YAN

So how do you measure your YAN levels?   With the Vinmetrica YAN kit, it’s pretty simple:

  1. A 10 mL wine sample is titrated to pH 8.2 with Vinmetrica’s TA Titrant (this gives the TA value as a bonus).
  2. The YAN reagent (a special formulation of formaldehyde) is added. This causes any nitrogen (in the needed forms of amino groups or ammonia) to release one proton per amine/ammonia, lowering the pH.
  3. The sample is then titrated back to 8.2 as before.
  4. The YAN value, in mg/L, is calculated from the volume of TA Titrant used in the second titration.

When to measure and adjust YAN?

  1. At fermentation start (SG 1.09 – 1.11). Note that you will probably add yeast energizer or starter, e.g. GO-FERM, to activate your yeast, and Fermaid K or similar after pitching yeast. These usually provide sufficient YAN.  Measure if in doubt. You can make further adjustments with Fermaid or diammonium phosphate (DAP).  Avoid adding add DAP above 0.5 g/L.
  2. At 30% completion of fermentation (SG 1.06 – 1.08, 3 to 5 days typically). Make additions if needed with DAP or Fermaid K or O.
  3. DON’T add YAN after ~50% completion (i.e. ~12 Brix or SG 1.050).

NOTE: Use FermCalc (www.fermcalc.com) to guide you in making additions with DAP, Fermaid, or other nutrient sources.  Shown below is the calculation for 5 gal of juice at a specific gravity of 1.06, whose measured YAN was 70 mg/L, showing that 6.36 g of DAP is needed in this case

fermcalc yan calculator

Posted on Leave a comment

Who are we?

You all know by know what our company does. Have you heard the story of how we started? Officially opening up in January 2010, Vinmetrica was founded on the belief that Rich could put together products that would help winemakers like him. After a series of events involving several years of working as a research scientist at Eli Lilly, a move to Northern California and eventually an over abundance of apricots off a tree in Rich’s new backyard, the idea for Vinmetrica was born.

Rich followed the typical progression of the home winemaker we still encounter today. He began making apricot jam but had so much excess fruit that he decided to try his hand at winemaking and the eventual study of fermentation chemistry. Graduating from fermenting fruit to condensed juices, then to wine kits and finally to grapes. After a while he was confronted with the task of measuring sulfite levels.

With a background in analytical chemistry, Rich had a thorough understanding of measuring sulfite levels via the Ripper titration method and after a quick visit to a local winemaking store Rich returned with some Chemetrics Titrets. Despite knowing that they were not all that suitable for red wines, Rich kept trying to use them for a whole season before finally giving up… Determining the endpoint was not reproducible. There had to be another way!

Eventually landing on the iodine titrations Rich had done as an undergraduate he remembered how he could see a faint yellow iodine color about the same time as his cobbled together electrode system read an endpoint. This was all a lesson in using electrochemistry to detect an endpoint rather than a color indicator. And thus Vinmetrica, or at least the idea for it, was born.

Two platinum electrodes, disused equipment at work, a few components from Fry’s Electronics, and an output that he read with his voltmeter.. that’s how it all started. Wasn’t much to look at, but he found he could get reproducible results in minutes. This was about 1995. He used this setup for years in his garage.

Then, in 2008, after being let go from a position as the VP of Reagents and Assays at Molecular Devices and with a little bit of encouragement from his wife, Rich decided to start Vinmetrica. The company was founded on Rich’s desire to make the vintner’s job easier and more predictable.

His first task was to hire some employees so he hired his two sons (Richie & Tim) to fulfill various positions and needs for the company, as they could pop in and out easily while still attending college. As the company grew, his need for additional employees also grew and he eventually hired one of his step daughters (Karolyn) but she was about to leave for a study abroad program, so he decided to hire his other step daughter (Taylor) to fill the position as she had just graduated from college with a degree in Biology. And finally, the last family hire was Rich’s stepson (Bryan), who joined us for a few years after he graduated college. Throughout the past 13 years, Vinmetrica has only hired one non family member (Rachel). She was with us for several years before moving on to bigger things.

These days, our entire operation is family owned and operated; being completely ran by Rich, Taylor and Tim (with some IT help from Richie occasionally). We have expanded from a small operation selling direct to customers to now having over 10 distributors in the US plus 8 international distributors. Every item we sell comes through the doors of our warehouse in Carlsbad, CA before it is loving packaged and sent out.

When we say we are a small business, we mean it! And we thank our customers each and every day for supporting us! We wouldn’t be here without you.

Posted on 2 Comments

Some updates on the Vinmetrica SO2 test

We have some new information regarding the use of the Vinmetrica SO2 test on the SC-100A or the SC-300.  This information is also referenced in the latest versions of the manuals, which you can always access here:  Manuals On-line

  1. Running SO2 standards to check accuracy:

Sometimes we are asked if there is a way to check or calibrate the Vinmetrica free SO2 test, to make sure it’s accurate. The short answer is yes, but it’s tricky, and you generally don’t need to do so. “Calibration” is built into the SO2 reagents in the form of the SO2 Titrant, whose concentration is carefully controlled (at 0.0156 N, so that each mL used equals 20 ppm of SO2).  The reagents are quite stable up to and even beyond their stated expiration date.

If you want to try checking the accuracy of your SO2 titration, you can prepare “standards” of known concentration. The following link will lead you to the methods that we recommend for preparing SO2 standards: SO2 Standardization Check

This describes how to use potassium metabisulfite (KMBS) or preferably, sodium sulfite as a standard.  It also describes an alternative method that uses vitamin C (ascorbic acid) as a substitute for SO2.

As mentioned, the methods are a bit tricky to get good results. We won’t go into details for now, but if you look it up and have questions, we’re always here to help!

  1. Running Total SO2 tests:

Total SO2 tests are usually not necessary for most purposes of controlling wine oxidation and stability.  Sometimes commercial export requirements call for a total SO2 test, and sometimes winemakers want to know if total SO2 is creeping up in the background; for health and safety, the TTB has a limit of 350 ppm for total SO2.

The Vinmetrica method for total SO2 has a simple variation on the free SO2 method. You add 10 mL 1N sodium hydroxide (NaOH) to a 25 mL wine sample, cover the vessel to restrict air access, and let react 20 minutes with occasional or constant stirring.  At the end of this time, you add 8 mL (instead of the usual 2 mL) of your Acid Solution, 2 mL of the Reactant, then proceed with the normal SO2 titration.

What’s new here is that in the past we recommended a 10 minute reaction time with the sodium hydroxide.  We have found that in some cases, that resulted in a slightly lower value compared with a 20 minute time period.  Using reaction times longer than 20 minutes does not seem to make any difference.

Posted on 1 Comment

Stuck Fermentations

Primary Fermentation

Stuck primary fermentations in winemaking refer to a situation where the fermentation process slows down or stops before all the available sugars are converted into alcohol and carbon dioxide. This can be a common challenge for winemakers and may result in an incomplete or unbalanced wine. Several factors can contribute to stuck fermentations, and it’s essential to identify and address them promptly.

Common Causes of Stuck Fermentations:

    1. Temperature Fluctuations: Yeast activity is highly sensitive to temperature. If the temperature is too low, the yeast may become sluggish or dormant. Conversely, if it’s too high, it can stress the yeast and lead to stuck fermentation.
    2. Nutrient Deficiencies: Yeast requires various nutrients to thrive, such as nitrogen, vitamins, and minerals. A lack of essential nutrients can hinder yeast metabolism and lead to a stuck fermentation.
    3. Inadequate Aeration: Yeast needs oxygen during the early stages of fermentation. Insufficient aeration can limit yeast growth and fermentation progress.

Keep Reading More!

Posted on Leave a comment

Some notes on sulfites, pH and TA

Since harvest is again upon us all, we at Vinmetrica thought it would be a good time to share a few tips on measuring and adjusting the three key parameters you need as fermentation begins and shortly after: pH, TA and free SO2.

First, just a reminder that we have lots of information on our web site (www.vinmetrica.com).  You might want to browse through our Support section on the home page.  There you can find useful resources like videos, the latest version of the manual for your instrument, and our troubleshooting guide.

Second, we recommend you look through the latest version of your manual to refresh your memory as needed!

Measuring and adjusting pH and TA

Measuring pH is technically simple.  You calibrate your pH electrode, then insert it into the wine sample, let it equilibrate a few seconds and take the reading.  Here are some tips to keep it from going awry. Keep Reading More!

Posted on Leave a comment

pH 4.01 to pH 4.00 Label Update

The pH 4 reference solution (for use with the SC-200 or SC-300 unit + pH electrode) is now labeled as 4.00, the correct reference value at a temperature of 20 ℃ (68 ℉).  The chemical composition of the solution itself is unchanged from before, and its reference value is still 4.01 at 25 ℃ (77 ℉). It’s just that since most of us work on wine or other beverages that are closer to 15 to 20 ℃ (59 to 68 ℉), a value of 4.00 is slightly more accurate than 4.01. Instruments that use the old reference value 4.01 rather than the new value of 4.00 do not produce significant error: less than 0.02 pH difference in wines with pH values from 3.00 to 4.00.

As mentioned in a recent newsletter, we have a new update to the firmware for SC-200s and -300s built after 2015 (Serial numbers 2897 and above for SC-300s, 470 and above for SC-200s).  This new firmware, versions 3.2.F (or 2.2.F for an SC-200) and higher, uses the value of 4.00 instead of 4.01 for pH calibration.  All new units being shipped will now have this new firmware version installed on them. If your instrument has a lower serial number, or an earlier version of firmware, it will set the pH 4 reference to 4.01 as usual.